Sampling is fundamental to many different forms of beat production and can be used in any sub-genre of hip hop. Whether you’re digging through record crates for the perfect soul sample or creating your own library of loops (either recorded yourself or from a sample pack), there is no getting around sampling in hip hop music. When I started making beats inspired by the likes of Madlib and Metal Fingers, I was almost exclusively using old soul samples.
One of the main issues I would run into while chopping up samples was clipping. Clipping is when your audio sample is amplified past the allowed limit in your DAW. It’s really frustrating when you’ve found the perfect sample to use, have cut it up in a very creative way, but then all the transitions between clips have this little popping or clicking sound at the end or the start of every sample.
For years, I tried to blend this clicking into the beat by using the drums to cover up the clipping sounds. I would try to have a kick or snare hit to mask the nasty pops and clicks. Once I reached a point in my production skills where I was digging into mastering, I realized that I wasn’t hiding the pops and clicks as well as I thought.
THE SOLUTION WAS SO SIMPLE, I COULDN’T BELIEVE I HADN’T THOUGHT OF IT BEFORE
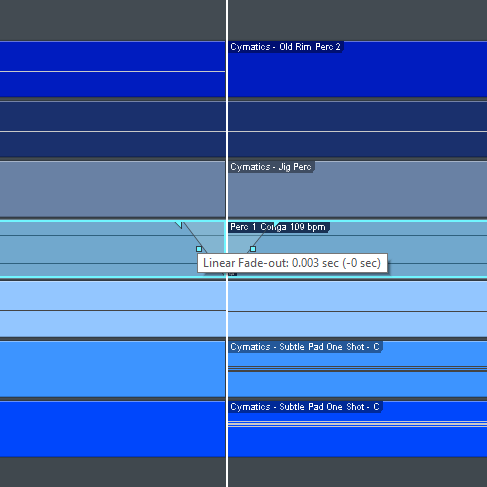
All you have to do is fade each sample in and out by .002 to .003 seconds. This transitions your sample clips so that they are not stopping and starting abruptly. Basically, your clipping is caused by a sound beginning to play from the clip and stopping suddenly – this is assuming you are already setting up your chops properly where the next sound does not appear until after the cut in the sample. Honestly, even if your cut wasn’t done precisely or if the sample itself does not lend to precise cutting this method will still improve the final product by a lot.
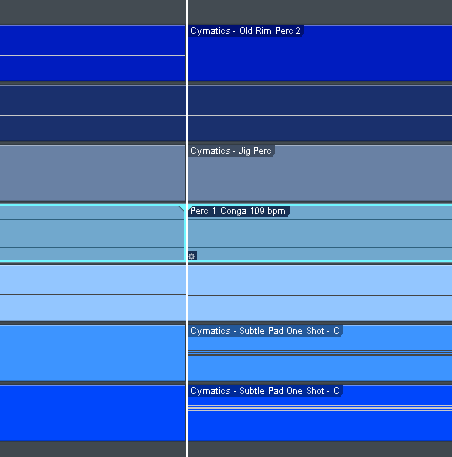
Before Fading
After Fading
Do not assume the clipping in your track is not noticeable. It only takes a few seconds to adjust your samples. This method also works when you’re chopping up sounds from a sample pack or cutting up a sample you already made. I actually do this to every sample I use regardless if I cut it up or not. I just highlight the entire track, set my marker between two samples that touch back to back, zoom in all the way, then set every clip in that track to fade in and fade out very slightly. Sometimes you may notice you need to do more than .002 or .003. In my experience, fading in and out any more than this will become noticeable. But I still believe that you’re better off having a noticeable fade in/out in a sample than to have clipping in your final product.
If you want to experiment with this technique or just get your hands on some fresh samples for your productions, you can download some of my free sample packs here! I’ve curated the best sounds from the internet and compiled them for you. Enjoy!
